Time for the chassis out, valves uncovered test.
All plugged in, volume all the way down, power on... valves warm up and are glowing nicely so I slowly roll up the volume. And I get a sound! Strum a bit, and I get some decent clean sound, roll up the tone and the sound gets a little bassier... so far so good. Strum a few more times... and with a sound I can best describe as a 'squeak' the amp stops working again.
Hmmm...
Next step is giving all the components a quick once over, visually and with multimeter, just to make sure everything's okay.
After that, it's time to get reading because if there's not anything that's obviously blown up/melted/phased out of reality I really have no idea what's happened.

Sunday, 30 October 2011
Harley Benton GA5 head - Power up and begin troubleshooting
So, with the chassis back in the box (probably unneccessary, but I did it anyway) I took the amp upstairs, plugged it into my 4x12, switched it on and... nothing. Not a jot. Not even a hiss or hum.
I know it's not a problem with the speaker cable or cab, as I tested them using my Peavey Road Master head just now and they work fine. So what other possible issues could there be?
I don't think it's the EL84 (power amp valve) as that was glowing quite happily when I looked in the back of the head. No idea if the 12AX7 was glowing as it's in a metal tube thing so obviously I can't see it. Next power-on test will be chassis out, valves uncovered so I can see them both. In the mean time I'm going to have a closer look at all the connections within the amp and double double check that nothing's loose or broken. Also going to bodge some means of keeping that in-line fuse thingy closed in case that's a problem.
Saturday, 29 October 2011
Harley Benton GA5 head
Wow... turns out it's been nearly a month since I last updated this blog. That's mostly due to the fact I haven't really done any project stuff in that time. Which is lame as I still have that Swift LP copy to finish off.
Anyway, today I went to Bristol and picked up a non-working Harley Benton GA5 head for £10. The GA5 is basically an Epiphone Valve Junior with a tone control added and with the "Valve Junior" scraped off the PCB. I've had a look inside and can see no obvious problems (exploded components, loose wires, etc.) so tomorrow will power it up and see if it makes a noise. When I originally took the back off I noticed some kind of broken plastic thingy containing a fuse coming out of one of the transformers and thought that might be the problem but looking inside the wire doesn't connect to anything so I assme it's a bit of generic construction and whether it gets connected to anything depends on other factors (I suspect it'll be something to do with the country it's going to be used in).
Anyway, here are some pictures. It's not a bad looking little amp really. I've called it Bert.
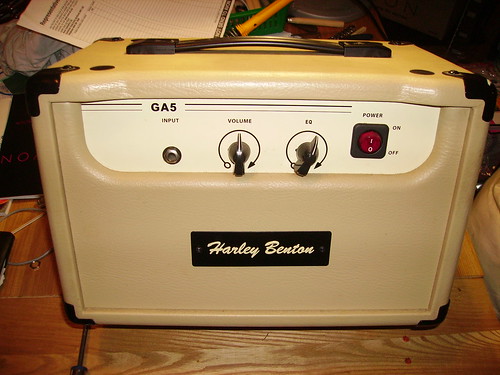
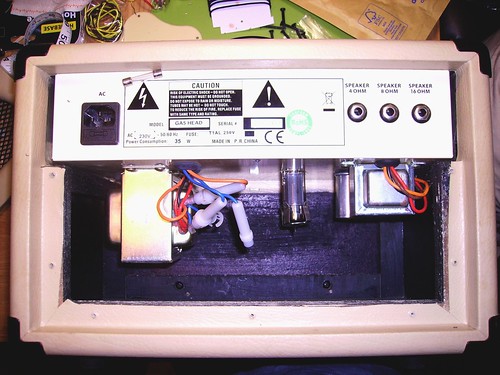
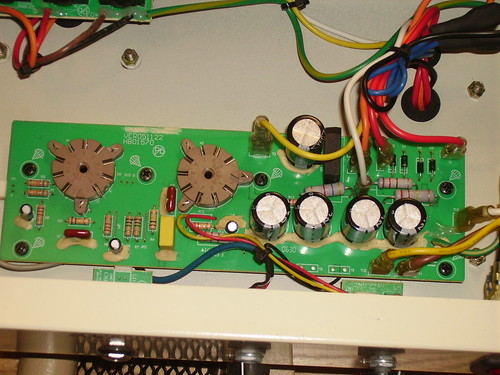
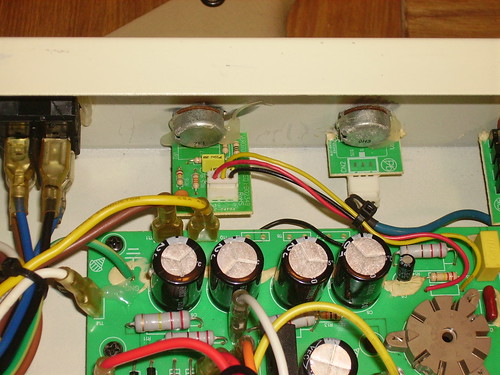
Quite pleased with this really... needs a whole bunch of work doing; even if it did work some of the components probably aren't as good as they could be and I'm not sure I'm keen on all those floating resistors.
Anyway, today I went to Bristol and picked up a non-working Harley Benton GA5 head for £10. The GA5 is basically an Epiphone Valve Junior with a tone control added and with the "Valve Junior" scraped off the PCB. I've had a look inside and can see no obvious problems (exploded components, loose wires, etc.) so tomorrow will power it up and see if it makes a noise. When I originally took the back off I noticed some kind of broken plastic thingy containing a fuse coming out of one of the transformers and thought that might be the problem but looking inside the wire doesn't connect to anything so I assme it's a bit of generic construction and whether it gets connected to anything depends on other factors (I suspect it'll be something to do with the country it's going to be used in).
Anyway, here are some pictures. It's not a bad looking little amp really. I've called it Bert.
Quite pleased with this really... needs a whole bunch of work doing; even if it did work some of the components probably aren't as good as they could be and I'm not sure I'm keen on all those floating resistors.
Saturday, 1 October 2011
Project Weekend! - Swift Les Paul copy
I've almost completed rebuilding the Les Paul copy. The new electronics have been installed (after some chiseling and a lot of filing as the CTS pots are larger than the ones that came in the guitar). I've chosen to wire it in the 1950s Gibson style, mostly becaue I could, really.
The only problem is the I'm missing one of the bridge posts and the nut, so I've had to order new ones as I am seriously stumped as to where the originals have ended up.
Photos of my embarrassing soldering will be posted tomorrow.
The only problem is the I'm missing one of the bridge posts and the nut, so I've had to order new ones as I am seriously stumped as to where the originals have ended up.
Photos of my embarrassing soldering will be posted tomorrow.
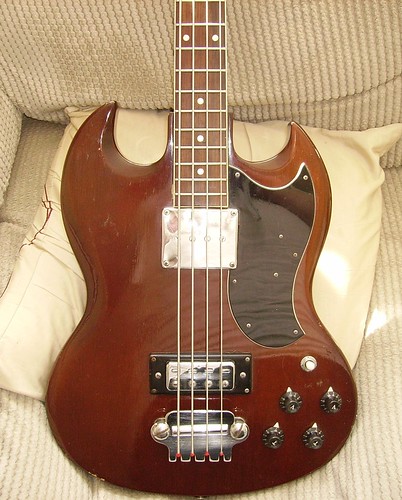
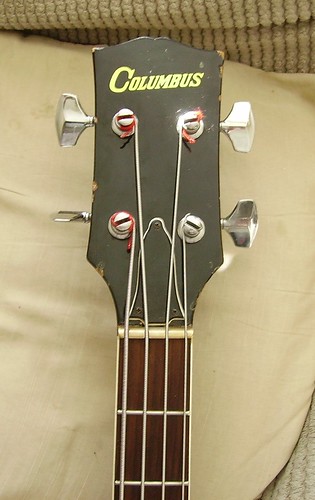
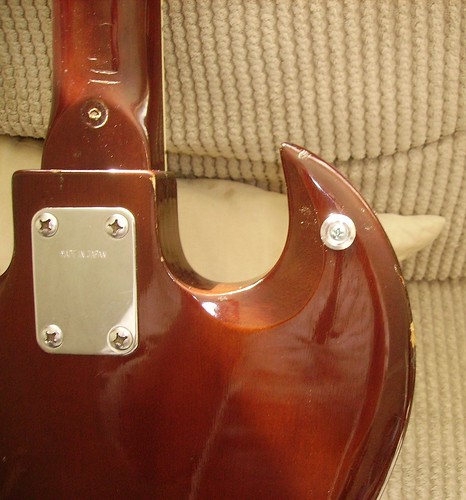
Project Weekend! - Columbus EB-3
Well, the gunky, dusty, stickery bass I got free is now a shinyclean bass I got free.
I removed the damaged old nut (which I meant to photograph but forgot) and then I thoroughly cleaned everything that looked like it needed a clean (which was most of it). I started with some synthetic wire wool which took all the dirt/rust of the frets, bridge and pickups. After that I scraped the stickers off and removed the gunk with WD-40, then I gave everything a quick wipedown with a clean cloth to remove all dust and residue. Next I gave the body, headstock and back of the neck a polish with some handy furniture polish I had in the cupboard (not completely ideal but this isn't a show instrument and I'm not going to go out in this heat just to get some 'proper' guitar polish) and rubbed some lemon oil into the fretboard to make it all nice. Then I used the cloth to give the metal bits a quick buff.
After everything was shiny I installed the new brass nut with a little PVA to hold it as it's a little narrower than the original so isn't a snug fit. Once the glue was dry I restrung it using the strings it came with and trimmed the excess wire the previous owner had left on them to make it all a bit neater. Finally I added the new strap buttons, moving the one that originally would have gone on the neck to the bass side horn.
Subscribe to:
Posts (Atom)