I think I want to have a go at making my own pickups at some point.
That's all for today.

Thursday, 15 December 2011
Sunday, 6 November 2011
Lestelepaulcaster
Having thought about the design of the guitar me and FiL are going to build I'm leaning heavily in the direction of a Les Paul/Telecaster hybrid... something similar to the Fano Alt de Facto SP6.
I've been mulling the idea around in my brain for a little while and after going to look for it online to see if anyone else had done something similar it not only turned out that they had, but that it actually works.
The major difference between the Fano and my idea is that I'm intending to have a 25.5" scale and a Tele-style headstock (mostly because I get on better with 6-in-a-line tuners). Materials are still a bit of an unknown, apart from knowing that FiL can source maple for the neck. Not sure exactly how I plan on doing the controls yet, but I suspect I'll go down the route of each pickup having its own volume and tone pots for maximum versatility.
I'm feeling rather excited by this.
Harley Benton GA5 head - Diagnosis
Took the GA5 to see Oli today, as he knows a bunch more about amps than I do and I was sorting and IDing a load of old (and I mean old) Warhammer stuff for him.
Turns out the problem is the power amp valve (EL84)... which it had occured to me it might be but without any other valves to test it with I couldn't be sure. Just glad it wasn't the power transformer really, as apparently those can be expensive.
So next thing is to get a new valve, I might replace the 12AX7 at the same time just so then it's full of all new valves. Oli tested it with Mullards, but I suspect those'll be a bit out of my price range.
Saturday, 5 November 2011
Let the planning commence...
Spoke to my father-in-law this morning... not only is he happy to help me out with building a guitar, but he reckons he can source the wood for it as well.
WIN.
Sunday, 30 October 2011
Harley Benton GA5 head - It's alive! IT'S ALI- oh..
Time for the chassis out, valves uncovered test.
All plugged in, volume all the way down, power on... valves warm up and are glowing nicely so I slowly roll up the volume. And I get a sound! Strum a bit, and I get some decent clean sound, roll up the tone and the sound gets a little bassier... so far so good. Strum a few more times... and with a sound I can best describe as a 'squeak' the amp stops working again.
Hmmm...
Next step is giving all the components a quick once over, visually and with multimeter, just to make sure everything's okay.
After that, it's time to get reading because if there's not anything that's obviously blown up/melted/phased out of reality I really have no idea what's happened.
Harley Benton GA5 head - Power up and begin troubleshooting
So, with the chassis back in the box (probably unneccessary, but I did it anyway) I took the amp upstairs, plugged it into my 4x12, switched it on and... nothing. Not a jot. Not even a hiss or hum.
I know it's not a problem with the speaker cable or cab, as I tested them using my Peavey Road Master head just now and they work fine. So what other possible issues could there be?
I don't think it's the EL84 (power amp valve) as that was glowing quite happily when I looked in the back of the head. No idea if the 12AX7 was glowing as it's in a metal tube thing so obviously I can't see it. Next power-on test will be chassis out, valves uncovered so I can see them both. In the mean time I'm going to have a closer look at all the connections within the amp and double double check that nothing's loose or broken. Also going to bodge some means of keeping that in-line fuse thingy closed in case that's a problem.
Saturday, 29 October 2011
Harley Benton GA5 head
Wow... turns out it's been nearly a month since I last updated this blog. That's mostly due to the fact I haven't really done any project stuff in that time. Which is lame as I still have that Swift LP copy to finish off.
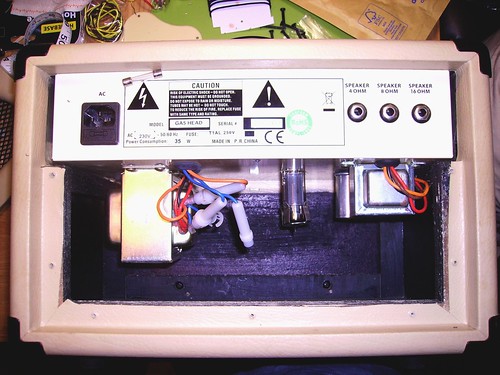
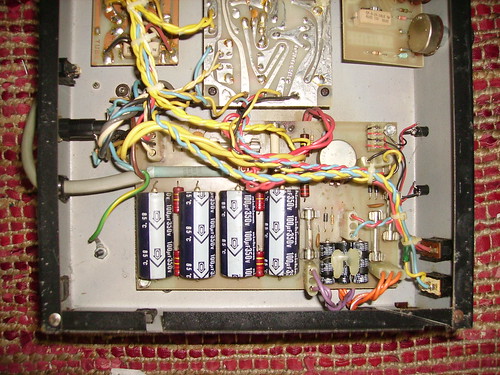
Anyway, today I went to Bristol and picked up a non-working Harley Benton GA5 head for £10. The GA5 is basically an Epiphone Valve Junior with a tone control added and with the "Valve Junior" scraped off the PCB. I've had a look inside and can see no obvious problems (exploded components, loose wires, etc.) so tomorrow will power it up and see if it makes a noise. When I originally took the back off I noticed some kind of broken plastic thingy containing a fuse coming out of one of the transformers and thought that might be the problem but looking inside the wire doesn't connect to anything so I assme it's a bit of generic construction and whether it gets connected to anything depends on other factors (I suspect it'll be something to do with the country it's going to be used in).
Anyway, here are some pictures. It's not a bad looking little amp really. I've called it Bert.
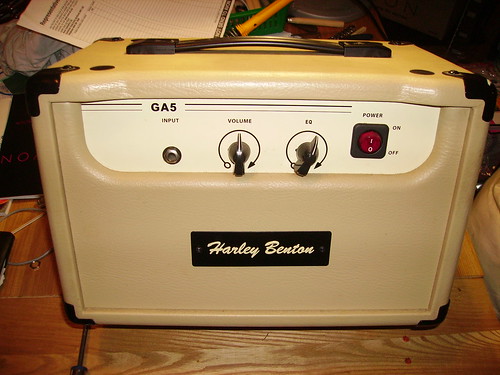
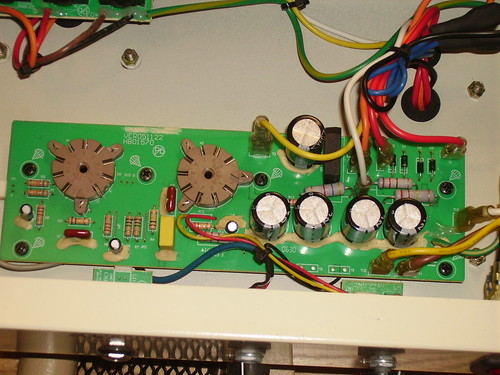
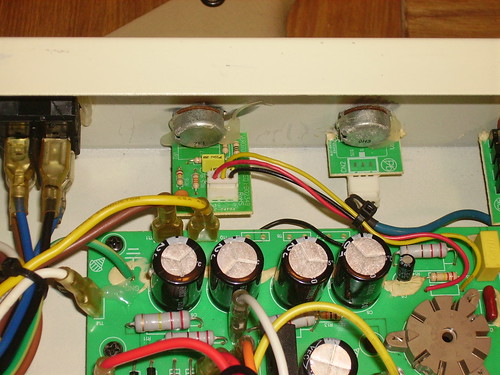
Quite pleased with this really... needs a whole bunch of work doing; even if it did work some of the components probably aren't as good as they could be and I'm not sure I'm keen on all those floating resistors.
Anyway, today I went to Bristol and picked up a non-working Harley Benton GA5 head for £10. The GA5 is basically an Epiphone Valve Junior with a tone control added and with the "Valve Junior" scraped off the PCB. I've had a look inside and can see no obvious problems (exploded components, loose wires, etc.) so tomorrow will power it up and see if it makes a noise. When I originally took the back off I noticed some kind of broken plastic thingy containing a fuse coming out of one of the transformers and thought that might be the problem but looking inside the wire doesn't connect to anything so I assme it's a bit of generic construction and whether it gets connected to anything depends on other factors (I suspect it'll be something to do with the country it's going to be used in).
Anyway, here are some pictures. It's not a bad looking little amp really. I've called it Bert.
Quite pleased with this really... needs a whole bunch of work doing; even if it did work some of the components probably aren't as good as they could be and I'm not sure I'm keen on all those floating resistors.
Saturday, 1 October 2011
Project Weekend! - Swift Les Paul copy
I've almost completed rebuilding the Les Paul copy. The new electronics have been installed (after some chiseling and a lot of filing as the CTS pots are larger than the ones that came in the guitar). I've chosen to wire it in the 1950s Gibson style, mostly becaue I could, really.
The only problem is the I'm missing one of the bridge posts and the nut, so I've had to order new ones as I am seriously stumped as to where the originals have ended up.
Photos of my embarrassing soldering will be posted tomorrow.
The only problem is the I'm missing one of the bridge posts and the nut, so I've had to order new ones as I am seriously stumped as to where the originals have ended up.
Photos of my embarrassing soldering will be posted tomorrow.
Project Weekend! - Columbus EB-3
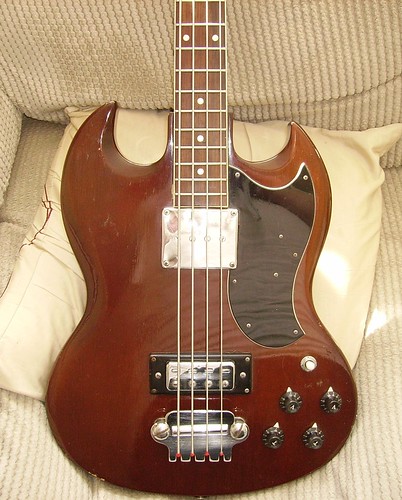
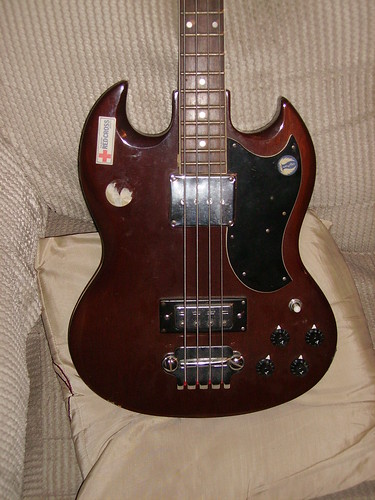
Well, the gunky, dusty, stickery bass I got free is now a shinyclean bass I got free.
I removed the damaged old nut (which I meant to photograph but forgot) and then I thoroughly cleaned everything that looked like it needed a clean (which was most of it). I started with some synthetic wire wool which took all the dirt/rust of the frets, bridge and pickups. After that I scraped the stickers off and removed the gunk with WD-40, then I gave everything a quick wipedown with a clean cloth to remove all dust and residue. Next I gave the body, headstock and back of the neck a polish with some handy furniture polish I had in the cupboard (not completely ideal but this isn't a show instrument and I'm not going to go out in this heat just to get some 'proper' guitar polish) and rubbed some lemon oil into the fretboard to make it all nice. Then I used the cloth to give the metal bits a quick buff.
After everything was shiny I installed the new brass nut with a little PVA to hold it as it's a little narrower than the original so isn't a snug fit. Once the glue was dry I restrung it using the strings it came with and trimmed the excess wire the previous owner had left on them to make it all a bit neater. Finally I added the new strap buttons, moving the one that originally would have gone on the neck to the bass side horn.
Friday, 30 September 2011
Project Weekend!
Due to minor injuries (not mine) I will not be having my planned weekend of running around some woods with a rubber sword pretending to be an elf... so this weekend becomes Project Weekend! Yay!
I plan to have both the Swift LP and Columbus EB-3 in working order by Sunday night. Whether this actually happens probably depends on how hot the weather is, but I full intend to at least have a go at it.
I plan to have both the Swift LP and Columbus EB-3 in working order by Sunday night. Whether this actually happens probably depends on how hot the weather is, but I full intend to at least have a go at it.
Wednesday, 28 September 2011
Columbus EB-3 Copy - First Impressions
Well, I had a bit of a play with the bass before I started taking bits off for clean up.
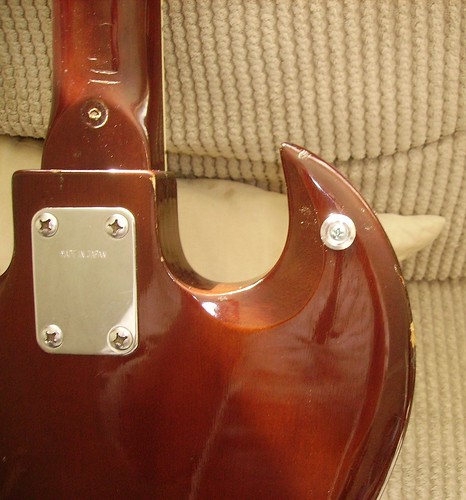
First impressions are good. The finish is translucent (and pretty bashed about, but it is 40-odd years old), which means obvious plywood is obvious, but overall the quality of the materials and workmanship isn't at all bad and the neck appears to have been carved from a single piece rather than two as is common on cheaper necks with angled headstocks. The fretboard is nice and smooth, all the (quite small, considering I'm used to medium jumbos) frets are in good nick and the binding is very well done. The bridge is some weird floating thingy that seems to be a hybrid of the old Gibson 2-point bridges and the original Danelectro bridges and the strings are bent almost at right angles between the bit where the ball ends anchor (which is quite sturdily fixed to the body) and the bridge itself. Oh, and it turns out the 'saddle' isn't fixed to the bridge and has been stamped out of some cheap, thin metal.
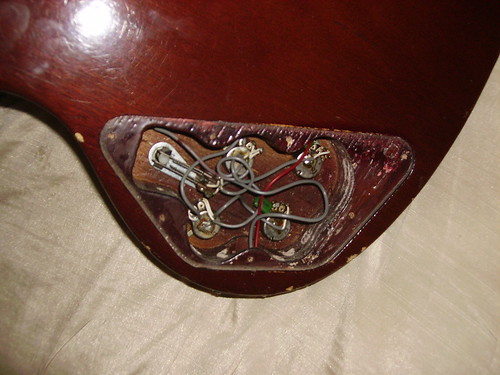
It's pretty comfortable to play sat on my knee (the guy kept the strap buttons, so I presume they must've been expensive ones for strap locks or something) and despite the deeeeeep neck pocket upper fret access isn't too much of a pain (though keeping this once I've put new strap buttons on it will necessitate relocating the one that was on the neck). Plugged in it gives a good sound... with the neck pickup. The bridge pickup is, frankly, useless on its own and sucks a lot of tone out of the thing when both are on. Don't know if this is because it's a rubbish pickup or if it just needs bringing closer to the strings, I'll find out when I've cleaned it up and put the strings back on! The volume and tone pots are not at all scratchy and all seem to work fine. Might replace the caps though, they've got those cheapo green ones at the moment. The switch is on its last legs, it has a lot of side-to-side movement and no longer 'clicks' when used so that'll need replacing too.
Next week I'll be doing the full clean up and replacing the nut as the current one is seriously damaged and I just happen to have a brass one lying around because of a parts order where I first got the wrong stuff, but then got the right stuff but was allowed to keep the wrong stuff. Win.
First impressions are good. The finish is translucent (and pretty bashed about, but it is 40-odd years old), which means obvious plywood is obvious, but overall the quality of the materials and workmanship isn't at all bad and the neck appears to have been carved from a single piece rather than two as is common on cheaper necks with angled headstocks. The fretboard is nice and smooth, all the (quite small, considering I'm used to medium jumbos) frets are in good nick and the binding is very well done. The bridge is some weird floating thingy that seems to be a hybrid of the old Gibson 2-point bridges and the original Danelectro bridges and the strings are bent almost at right angles between the bit where the ball ends anchor (which is quite sturdily fixed to the body) and the bridge itself. Oh, and it turns out the 'saddle' isn't fixed to the bridge and has been stamped out of some cheap, thin metal.
It's pretty comfortable to play sat on my knee (the guy kept the strap buttons, so I presume they must've been expensive ones for strap locks or something) and despite the deeeeeep neck pocket upper fret access isn't too much of a pain (though keeping this once I've put new strap buttons on it will necessitate relocating the one that was on the neck). Plugged in it gives a good sound... with the neck pickup. The bridge pickup is, frankly, useless on its own and sucks a lot of tone out of the thing when both are on. Don't know if this is because it's a rubbish pickup or if it just needs bringing closer to the strings, I'll find out when I've cleaned it up and put the strings back on! The volume and tone pots are not at all scratchy and all seem to work fine. Might replace the caps though, they've got those cheapo green ones at the moment. The switch is on its last legs, it has a lot of side-to-side movement and no longer 'clicks' when used so that'll need replacing too.
Next week I'll be doing the full clean up and replacing the nut as the current one is seriously damaged and I just happen to have a brass one lying around because of a parts order where I first got the wrong stuff, but then got the right stuff but was allowed to keep the wrong stuff. Win.
Tuesday, 27 September 2011
Swift Les Paul Copy - Bits n' Pieces
The new electronics for the Swift LP copy arrived this morning. I probably won't be able to actually install them until next week, but I'll list them here anyway.
I have bought, from Axes R Us, the following:
Basically the aim here is to replicate the actually not-too-bad sound of the original setup using better quality parts. I've also taken the decision to use a lower value cap for the neck tone control just to reduce the amount of mud a bit.
ETA: I've just taken measurement of the DC resistance of the stock pickups... the neck came in at 9.9Kohm and the bridge at 10.1Kohm. Not as much of a difference as expectations nor conventional wisdom demanded, but no biggie... I mean, twin P90s are often the same value the difference being made in how close they are to the strings.
I have bought, from Axes R Us, the following:
- 2x CTS 250K linear pots (tone)
- 2x CTS 250K logarithmic pots (volume)
- 1 .47uf Sprague "Orange Drop" capacitor for the bridge tone control
- 1 .33uf Sprague "Orange Drop" capacitor for the neck tone control
- 1 three-way toggle switch
- 1 mono jack socket
- Various bits of wire
Basically the aim here is to replicate the actually not-too-bad sound of the original setup using better quality parts. I've also taken the decision to use a lower value cap for the neck tone control just to reduce the amount of mud a bit.
ETA: I've just taken measurement of the DC resistance of the stock pickups... the neck came in at 9.9Kohm and the bridge at 10.1Kohm. Not as much of a difference as expectations nor conventional wisdom demanded, but no biggie... I mean, twin P90s are often the same value the difference being made in how close they are to the strings.
Monday, 26 September 2011
Late 60s Columbus EB-3 copy
So... the early 70s Jazz copy I reported on yesterday turned out to be a late 60s EB-3 copy. Which, frankly is a bit more of a win as I've wanted an EB-3 style bass for ages and as it's a freebie I don't lose anything if it turns out I don't like playing it.
Strings are new, but will probably get some new ones anyway because it's short scale and the nut is in dire need of replacing.
And I reckon I could get a better bridge too.
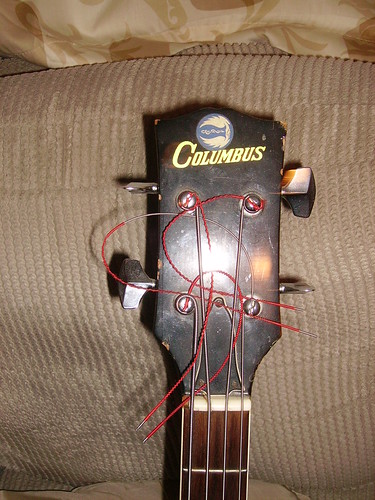
Strings are new, but will probably get some new ones anyway because it's short scale and the nut is in dire need of replacing.
And I reckon I could get a better bridge too.
Sunday, 25 September 2011
Early 70s Columbus Jazz Bass
Edit: turned out to be a 60s EB-3 copy... see next post for more details.
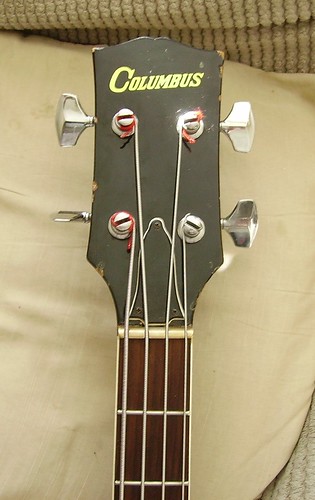
Columbus were a brand that ran from the late 60s to the early 80s and were put together in the Ibanez factory a Japanese factory that may or may not have been one of the ones also used by Ibanez. Not seen many pics of them, but with any luck it'll be a tobacco burst with bound fretboard and block inlays. Because that looks nice.
Will probably do the 'usual' mods on this... so swapping out the electronics, and possibly the pickups as well.
I'll post pictures tomorrow evening.
Friday, 9 September 2011
Quickie - Danelectro Fabtone
My first ever pedal was a Danelectro Fabtone, and I still have it. When I was 19 it was the best thing ever. At 30 it was a horrible hissy gain monster I never used. I took out the diodes D4 & D5 and capacitor C2 and the gain became a bit more controllable but the pedal was still very noisy.
Recently though I found this video which suggests putting an LED in the place of the D5. I've just done this and the extraneous noise is all gone!
Recently though I found this video which suggests putting an LED in the place of the D5. I've just done this and the extraneous noise is all gone!
Thursday, 25 August 2011
B.Y.O.C Confidence Booster - Finished
Added the battery clip and jack sockets to the Confidence Booster this evening.
It works perfectly.
The rig I tested it with was Ibanez EX140 modded with IronGear Platinum 90 in the neck position and overwound Rolling Mill in the bridge (volume 10, tone 10), into a Peavey Roadmaster 160w valve head (lead channel: Pre 5, Pump 4, Post 1) and Hayden 4x12 cab. With the guitar going straight into the amp the sound was very quiet and clean. With the Confidence Booster plugged in and the trim pot turned all the way up I got a lovely crunch overdrive from the amp. This is actually a very good bit of kit.
Next stage is to buy an enclosure, an A100k pot and DC power adaptor socket, and salvage the switch and LED from the EHX Memory Boy I broke.
I am very pleased with myself.
Thursday, 18 August 2011
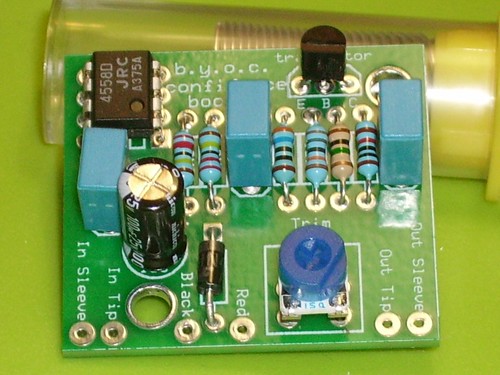
B.Y.O.C Confidence Booster
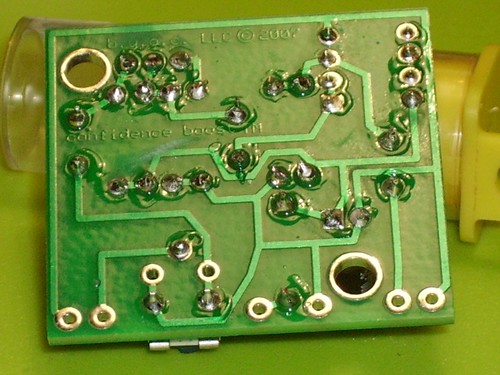
Well, I've completed the first part of this build; all the components that go directly on the PCB have been installed. I'm rather proud of my work here, the solder joints aren't perfect, but they're pretty neat... so yeah, the "Confidence" part has certainly lived up to it's name. I feel really good about what I've accomplished with this tonight.
Monday, 8 August 2011
Homebuilt Effects and Bass Cabinets.
So... I have orded myself a Build Your Own Clone Confidence Booster kit (from Vibe-O-Tronic). Basically this is a simple circuit which provides a boost in the signal path between guitar and amp. It doesn't come with an enclosure or anything which gives me an excuse to put it in something entirely random just for kicks. Looking foward to getting it so I can start learning more about electronics and effects building.
I've also arranged to get a bass cab, just a little'un with a single 15" speaker. I have no idea what the impedance is but luckily the Firebass head is variable there... also it has Elvis stickers all over the front which means I can claim it as trve necro or something on account of Elvis being dead.
I've also arranged to get a bass cab, just a little'un with a single 15" speaker. I have no idea what the impedance is but luckily the Firebass head is variable there... also it has Elvis stickers all over the front which means I can claim it as trve necro or something on account of Elvis being dead.
Saturday, 6 August 2011
New Bass! RetroVibe RV4 Blueburst Rickenfaker
I bought a new bass last week. I wasn't intending to, but the guy won't be selling them for much longer and when even your wife says "wow, that's a really nice bass, you should get it" there's no point in resisting.
Technically I can't afford it, but we have savings and I'll be making regular payments back into the savings until it's paid off... yes, I could have saved up for it but if I had it might have gone (and I certainly wasn't prepared to risk paying inflated prices on eBay).
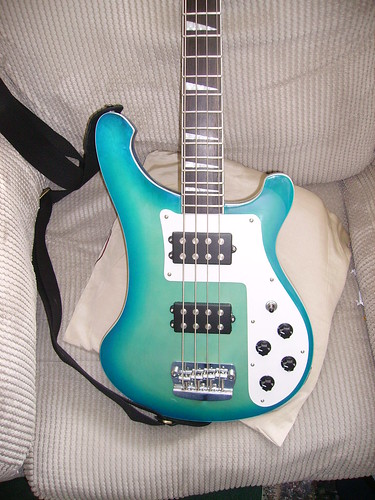
Isn't it lovely? Of course this being a guitar modding blog I can't just say I'll leave it as is, can I? I've already ordered a new nut (because the stock one is as naff as stock nuts usually are) and I think I might replace the plain white scratch plate with a nice cream/black/cream 3-ply job at some point in the future.
Technically I can't afford it, but we have savings and I'll be making regular payments back into the savings until it's paid off... yes, I could have saved up for it but if I had it might have gone (and I certainly wasn't prepared to risk paying inflated prices on eBay).
Isn't it lovely? Of course this being a guitar modding blog I can't just say I'll leave it as is, can I? I've already ordered a new nut (because the stock one is as naff as stock nuts usually are) and I think I might replace the plain white scratch plate with a nice cream/black/cream 3-ply job at some point in the future.
Monday, 25 July 2011
Saturday, 23 July 2011
Peavey Roadmaster Gut Shots
Today I added some handles to my Peavey Roadmaster head to make the thing a bit easier to carry (there were three handles originally but a previous owner decided to remove the ones at either end of the top for some reason. I can only assume he was a really strong guy), and while I had it out I decided to take some photographs of the insides.
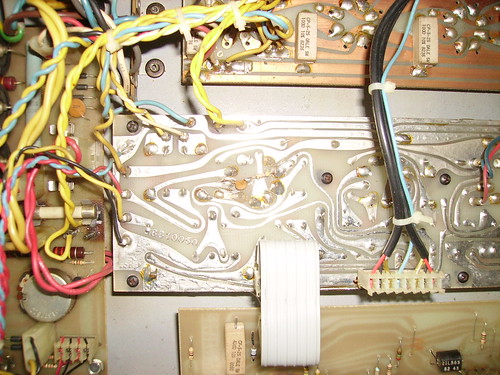
I love how those PCBs look. Modern parallel track boards just don't have that same flowing aesthetic.
I love how those PCBs look. Modern parallel track boards just don't have that same flowing aesthetic.
Wednesday, 20 July 2011
Pickup Prices
Today, having been let out of work early, I went checked out a local guitar shop just to see how much it would cost to get guitar pickups locally... I chatted to the guy and sneakily memorised the prices of a couple of pickups (Duncan Distortion and Duncan P-Rails) for later comparison with online prices.
I was expecting a bit of a mark up.
I wasn't expecting them to cost 35% more than they cost online.
So much for buying local!
I was expecting a bit of a mark up.
I wasn't expecting them to cost 35% more than they cost online.
So much for buying local!
Friday, 15 July 2011
Wednesday, 13 July 2011
Swift Les Paul Copy - More Thoughts
The more I think about it the more I realise that I probably won't try to sell this guitar on.
This isn't because I think it's so awesome that I must must must keep it, but because I seriously doubt I'd be able to make back what I spent on the instrument and will spend on the new parts. I took a gamble on a cheap instrument made by a company I'd never heard of and really I lost, I know I can make this into a decent instrument but the flaws I cannot do anything about will always be apparent. I'll keep it as a backup instrument for the time being and maybe one day when I can get a decent Les Paul copy for my own use and am no longer concerned with making my money back on this one I'll stick it on eBay or something.
This isn't because I think it's so awesome that I must must must keep it, but because I seriously doubt I'd be able to make back what I spent on the instrument and will spend on the new parts. I took a gamble on a cheap instrument made by a company I'd never heard of and really I lost, I know I can make this into a decent instrument but the flaws I cannot do anything about will always be apparent. I'll keep it as a backup instrument for the time being and maybe one day when I can get a decent Les Paul copy for my own use and am no longer concerned with making my money back on this one I'll stick it on eBay or something.
Monday, 11 July 2011
Swift Les Paul Copy - Slight Change of Plan
Decided I'm not going to do a full refinish at this stage. Firstly it's not worth using decent nitro lacquer on this thing and I'm not forking out for a professional paint gun thing at this stage just because I cannot find polyurethane in spray cans.
This means I get to not only lower my budget by quite a substantial amount, but means I can spend more of said budget on getting the parts I want rather than the ones that are just cheapest.
This means I get to not only lower my budget by quite a substantial amount, but means I can spend more of said budget on getting the parts I want rather than the ones that are just cheapest.
Saturday, 9 July 2011
Swift Les Paul Copy - In Bits
Damn, this is going to be harder than I thought.
The reasonably professionalish exterior hid some very shoddy workmanship (save the soldering which was actually pretty darn good). The screw holes for the neck are all over the place, the truss rod is very off centre and possibly at an angle too, the the top has been shaped over a central block rather than carved and capped meaning there's a lot of air between it and the main body block (I guess I could say it's semi-hollow if I sell it on!).
There's going to be a fair amount of filling and sanding and chiselling and hopefully not having to buy a new neck.
Oh, and it turns out it's loaded with 250k pots and .047uf caps... which might explain the unexpectedly meaty sound. I think I may stick some 300k pots in to bring up the brightness a teeny bit whilst still keeping that awesome bottom end.
Swift Les Paul Copy - What I'm Going To Do
Just a quick list of things I'm going to do with this guitar.
- Refinish body and headstock in black, if the neck is decent-looking wood I'll do it in a "vintage tint" clearcoat otherwise that'll be black too.
- Replace all electronics (except pickups as they're actually surprisingly good).
- File down rough fret ends.
- Adjust neck angle by adding a shim to the neck pocket.
- Add new scratchplate (previous owner removed the original at some point, it did not come with the guitar so is presumably lost).
Swift Les Paul Copy - First Photos
Thought I'd take some photos of the guitar before I dismantle it and start work.
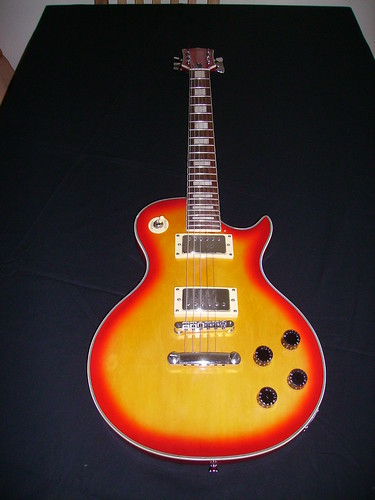
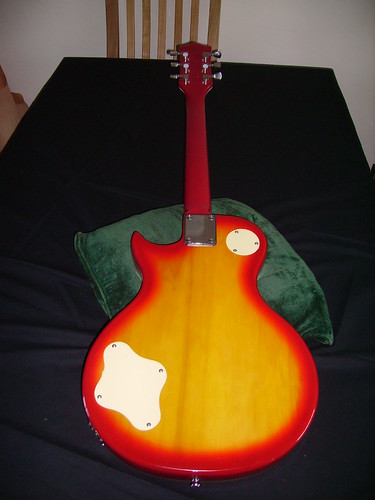
As you can see it's not actually a bad looking instrument.
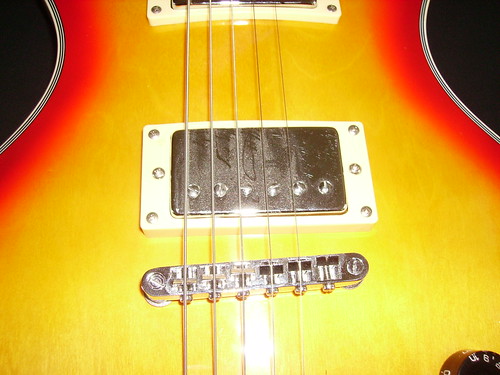
Of course it's a different story close up! Both pickups are set about a 1/32-1/16" too far towards the treble side of the guitar...
The binding on the neck could be a bit better, but I have to admit it is a nice touch on an instrument this cheap.
Obvious plywood is obvious...
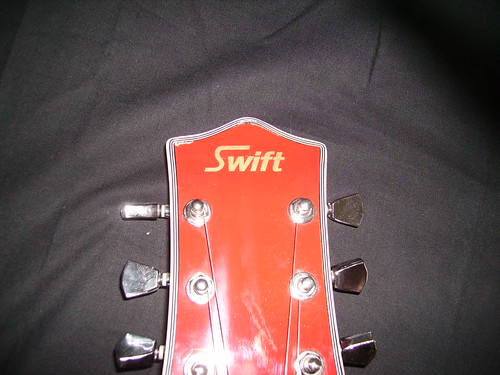
Headstock and logo, the logo will be lost when I do the refin, the dodgy bits around the top are actually damage rather than poor workmanship.
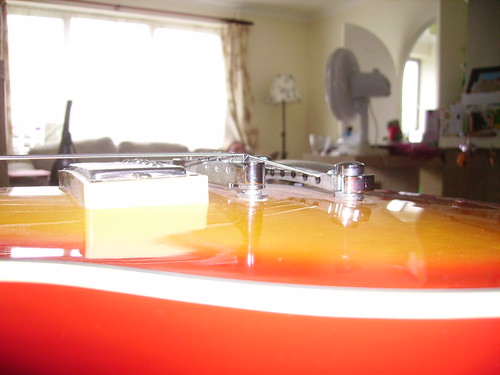
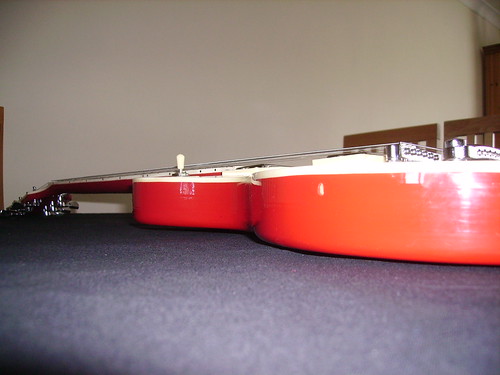
The action was really high when I got it, the bridge is now as low as I can make it and the action is still a bit high, but only by 1/16", which is nowhere near as bad as it was!
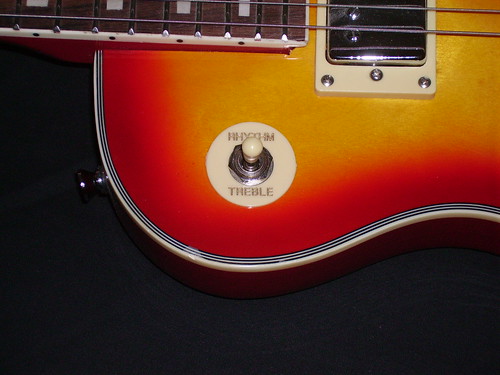
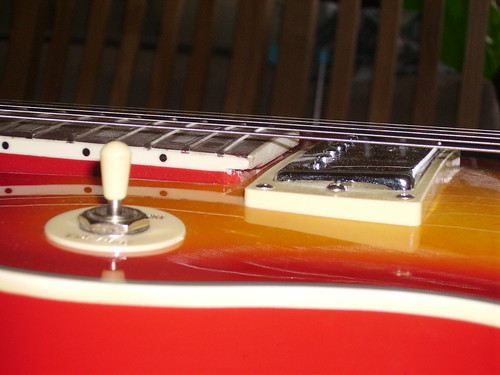
Apparently whoever made it decided to put the selector switch upside down. No, it's not just that the switch ring is upside down, the whole switch is!
So there it is, the guitar as I bought it (almost, as mentioned before I lowered the action as much as I can). It's going to need a fair bit of work, but I don't think there's anything I can't manage.
As you can see it's not actually a bad looking instrument.
Of course it's a different story close up! Both pickups are set about a 1/32-1/16" too far towards the treble side of the guitar...
The binding on the neck could be a bit better, but I have to admit it is a nice touch on an instrument this cheap.
Obvious plywood is obvious...
Headstock and logo, the logo will be lost when I do the refin, the dodgy bits around the top are actually damage rather than poor workmanship.
The action was really high when I got it, the bridge is now as low as I can make it and the action is still a bit high, but only by 1/16", which is nowhere near as bad as it was!
Apparently whoever made it decided to put the selector switch upside down. No, it's not just that the switch ring is upside down, the whole switch is!
So there it is, the guitar as I bought it (almost, as mentioned before I lowered the action as much as I can). It's going to need a fair bit of work, but I don't think there's anything I can't manage.
Wednesday, 6 July 2011
Swift Les Paul Copy - Plugged In
Wow.
Once I'd got it plugged in and tuned to E-standard (which took a while because the pickup selector switch has been dicked about with at some point so the signal kept cutting out), I turned on the Big Muff (tone at 11 o'clock, sustain on full) just to see whether this thing rocked.
Again, wow. I was seriously expecting some awful sounding, reedy hiss-fest. I couldn't have been wronger... this thing is meatier than a meat stew with an added side order of meat, followed by meat ice cream and accompanied by a cheeky but not pretentious meat wine. Jesus. The sustain is unexpectedly good as well. The pickups are definitely keepers.
Swift Les Paul Copy
Cheap project/learning guitar arrived today. £29 off eBay.
Just given it a quick look-over and here are my initial thoughts.
The finish is surprisingly good (though it does overlap the binding at a couple of points).
The body is apparently plywood but that's not surprising, and it's pretty solid and sounds okay acoustically. Plus it's a proper archtop which I wasn't expecting.
The neck is bolt-on rather than set which again isn't surprising.
The action is rather wonky, being very high towards the body end of the fretboard.
At some point the pickguard has been removed, this was not mentioned in the listing.
It seems to play okay (despite the dodgy action) but I immediately cut my thumb on a badly finished fret.
The fretboard inlays were done by monkeys.
Looks like I'm gonna have my work cut out here... it's not a brilliant instrument by any stretch of the imagination, but it's not as bad as it could have been!
Pics to follow in the next couple of days.
Sunday, 3 July 2011
Thursday, 30 June 2011
Thoughts: Rickenfakers
I find it amusing and a little sad how worked up people get over "Rickenfakers" (copies of Rickenbacker guitars, particularly the basses).
There seems to be this notion that Rickenbackers are somehow sacred and "fake"* instruments which, to most people (including me), look perfectly fine are described as hideous and 'sacreligious'. Hell, I even saw one thread on a forum where someone described seeing what appeared to be a Rickenbacker in a shop only to find out it was a "fake" as an "emotional rollercoaster". I think someone needs to get out more. You never hear people going on about "hideous fake" Les Pauls. Nobody gets their knickers in a twist when they see a Stratocaster that turns out to be made by someone other than Fender.
Rickenbacker don't seem to have worked out that the reason why these "fakes" continue to exist is that their instruments look really cool but are far too expensive for most people to afford. I'd be prepared to bet folding money that if Rickenbacker introduced mass-produced budget versions of their instruments they'd make an absolute killing on them. I'd certainly buy one.
Hell, the Japanese companies that made the first Rickenfakers did so as a compliment! In Japan copying the work of another is seen as a mark of respect, not an attempt to rip off the original. If only the capitalist West realised that a bit more.
*This is one of the biggest issues I have with all this. To me it's only "fake" if it is being sold as genuine when it's not. These instruments aren't, most of them are quite unashamed of their non-genuineness.
Wednesday, 29 June 2011
Fender Jag-Stang
It's going to be a while until I'm able to work on this one, but I thought I might as well post it anway.
Many years ago I bought a Fender Jag-Stang... I was young, obsessed with Nirvana and somehow had the money for it. The thing is, it plays really nicely but sounds like bollocks. The pickups are pretty poor and the electronics are rather wonky. Plus the floating trem is just rubbish. I plan on completely gutting this, immobilising the trem, stripping and refinishing the body and neck (stopping along the way to sort out any dents) and getting a new scratchplate.
Here's a picture of the guitar as it was before I dismantled it the other week. A picture of the guitar in bits will follow soon.
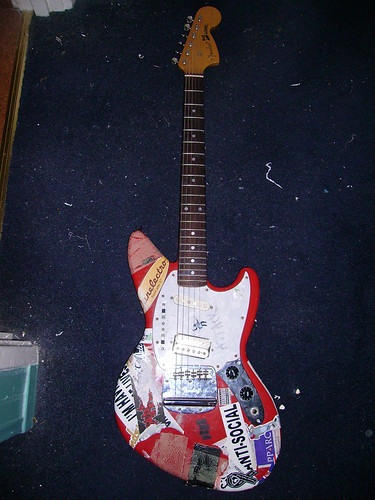
It Starts...
So here it is. A blog I'm intending will be used to mostly follow various guitar rebuilding projects; learning experiences, personal builds and possibly even stuff intended for resale. It will also contain thoughts on music (mostly doom and prog but I'll try to include other stuff as well) and the odd YouTube video of a band I like when no other content is forthcoming.
With any luck this will be at least a small success. :)
With any luck this will be at least a small success. :)
Subscribe to:
Posts (Atom)